On Saturday we went to a local yarn store because the socks I have been knitting turned out to be too big for their intended recipient. I needed yarn. Usually when I am in need of yarn I simply open my MacBook and see what Knit Picks has to offer, but Christmas is looming and these knee socks need to be finished before Santa arrives, so I took my chances.
After I sorted through the various shelves of sock yarn it took me a full fifteen minutes to decide which colorway to choose because unlike Knit Picks, my LYS does not have knit samples. While I appreciate I am a complete control freak, I still think most knitters would enjoy knowing how their stripes or variegates are going to knit up once they get their hanks of yarn home. Consider that I wanted stripes and I think I ended up with a variegate. Boo!
Anyhow. After my purchase was made, I was offered the chance to wind my yarn using the tools provided if I was willing to wait in line. Apparently my LYS does not offer this service any longer, but does offer the tools for us to do it ourselves. Thankfully, I have the ability to take care of my yarn at home, but if you don’t, or if you are not a knitter at all and are suddenly faced with strange equipment and a line of women looking terrified, don’t worry because I’ve got you covered.

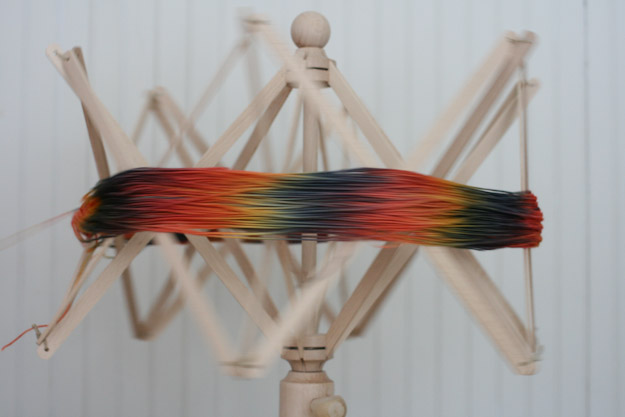
This the ball winder on the left and the yarn swift on the right. I know they look ridiculous, but approach them with confidence. Keep repeating, I am smarter than the yarn swift, silently to yourself.
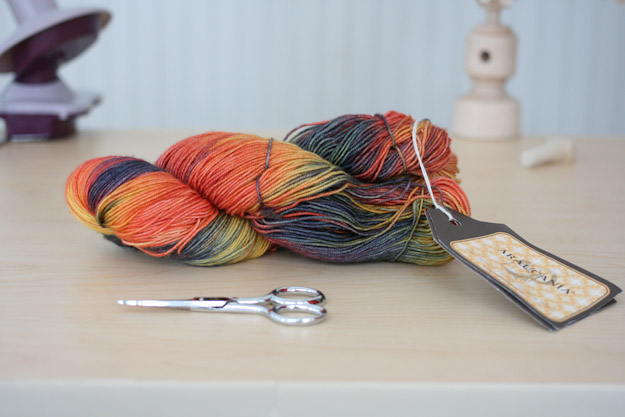
Your hank of yarn will look and feel like a gigantic knot, but it’s really just looped together in a twist. I promise you there will be a tiny pair of scissors nearby. Casually locate the scissors before you start.
The tag should come off your yarn fairly easily, but if it doesn’t, use the scissors you just found. I like to keep my tag because I attach it to the project when I am finished. The care instructions for the fiber are right on the tag. If you are not a knitter and are giving this yarn away as a present, keep the tag and reattach it to the hank after it’s wound.
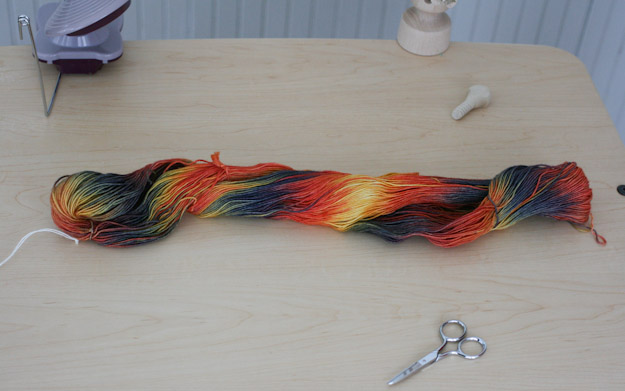
To unknot this hank I just twisted it and it unfolded. Almost all yarn works this way.

Now, make sure you can easily spread the yarn in a circle without anything becoming tangled. Just ignore the women behind you.
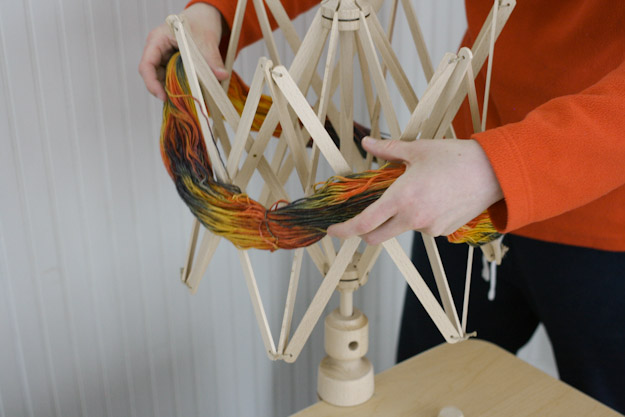
Pick up your circle of yarn and place it over the yarn swift. Notice that the swift is most likely going to be loose, but that is okay. We are going to fix that.
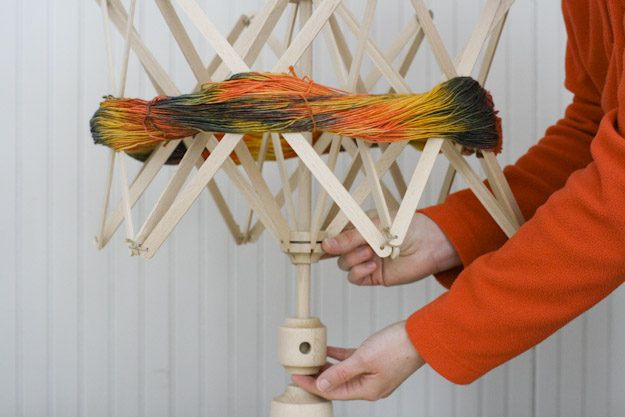
The idea is you want your hank of yarn around the center of swift. Trust me it does not need to be exact. Once it’s there, you will need to tighten the swift by pushing up on the bottom knob until the top of the swift is tight.
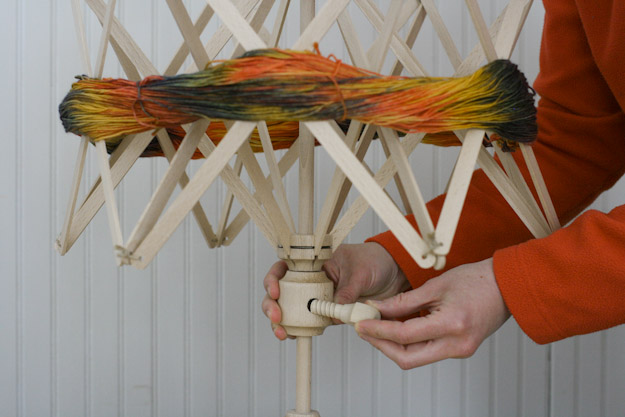
Insert the key or dowel in place to hold the top of the swift up.
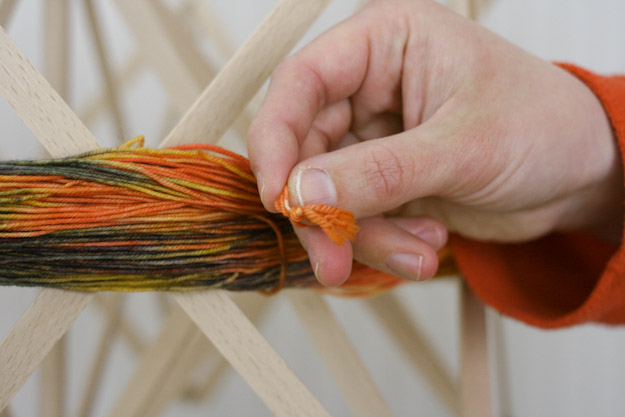
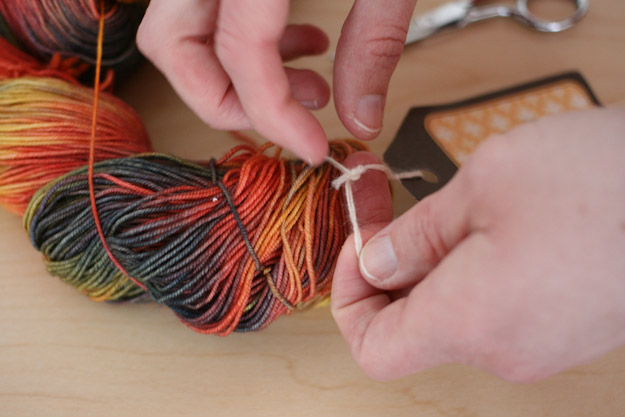
I’m sure you noticed that all around your hank of yarn are smaller pieces of yarn running vertical. These are ties that are holding the yarn together and they need to be cut. One of these ties is the actual beginning of your hank of yarn, while the rest are just ties and can be thrown away. Cut each tie right next to the knot.
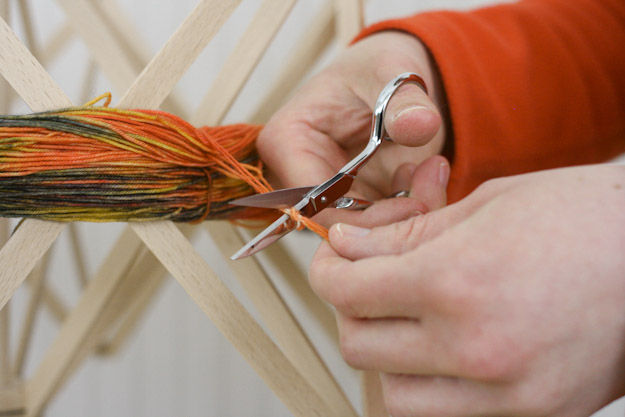
Keep cutting the ties all the way around your yarn.
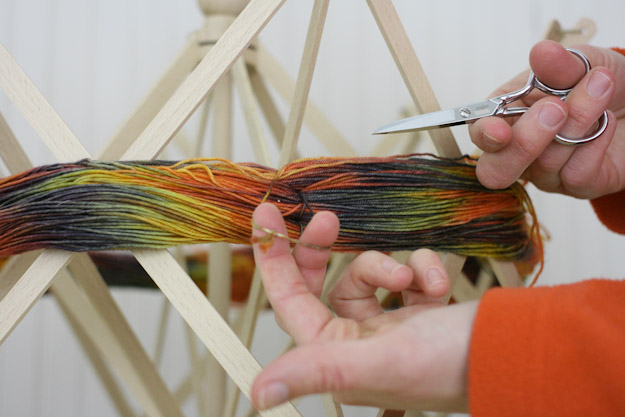
Eventually you will find the start of your hank.
Which also happens to be the end of your hank.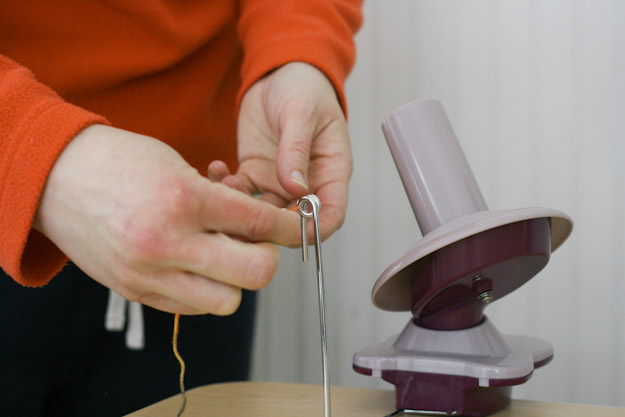
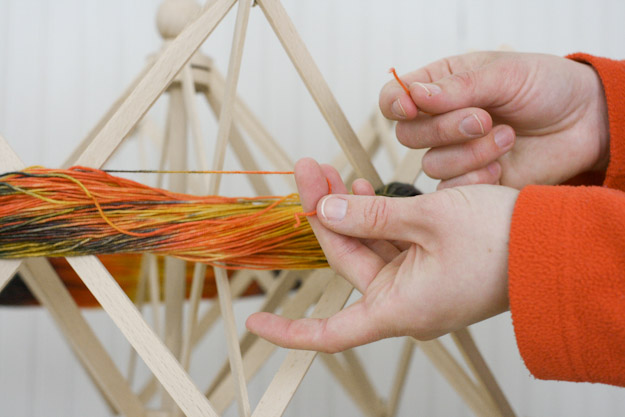
Pull one of the ends over to the ball winder, it does not matter which.
Thread the yarn through the eye on the ball winder.
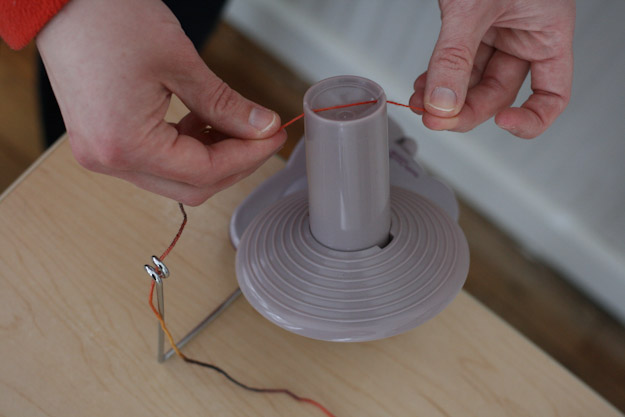 Then place the end in the slit on the top of the tube on the ball winder. Leave about a one or two inch tail.
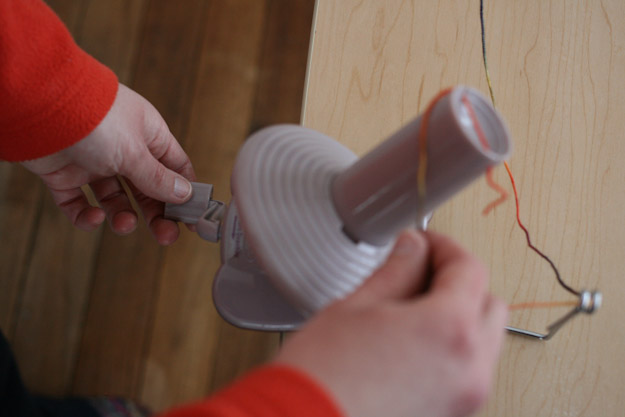
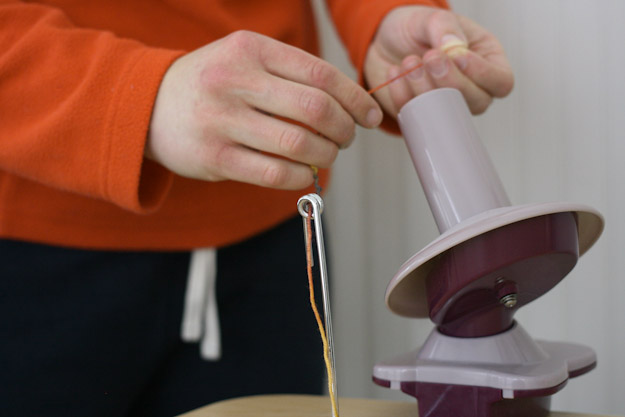
Now the hank of yarn is on the swift, running to the ball winder, threaded through the eye and attached to the slit in the top. It’s time to start winding. It is very, extremely, crucially important that you do the next part carefully. Start very slowly and make sure that this happens:

Do you see how the tail, or end of the yarn is wrapped underneath the yarn that is starting to wind around the tube? That is good. You will need to guide the tail underneath the yarn, but that is okay. Again, repeat after me, I am smarter than the yarn swift. More importantly, ignore the women behind you.
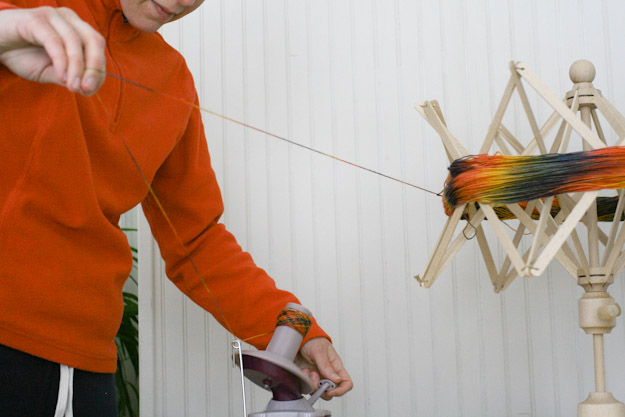
With your right hand hold the yarn out – about half as far as me, we were taking photos – just so there is tension and with your left hand continue to twist the handle on the ball winder. The yarn swift will turn automatically. It will start to turn very quickly.
The faster you turn, the faster the swift will go. Just remember if you need to stop turning the ball winder, you need to stop the swift or there will be a massive amount of yarn knotted on the floor. I’m speaking from experience. If your nose itches, simply reach over and stop the swift and when you’re ready again start turning the handle of the ball winder.
It really is a beautiful process.
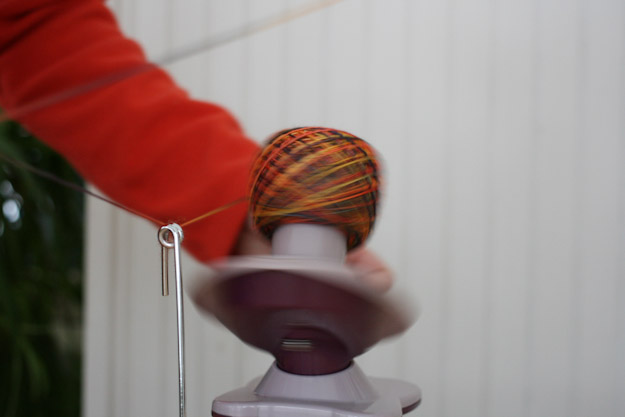
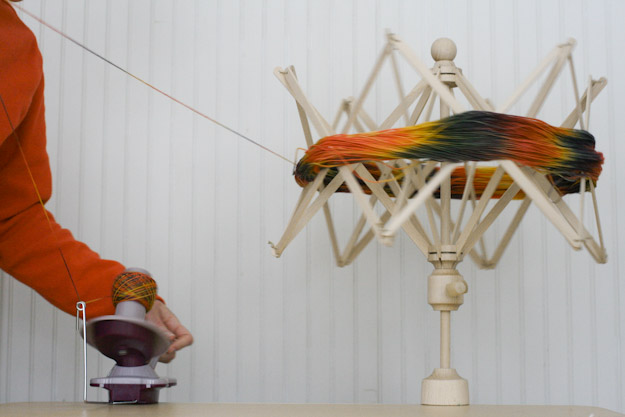
Most ball winders can hold an enormous amount of yarn so don’t even worry about having too much.

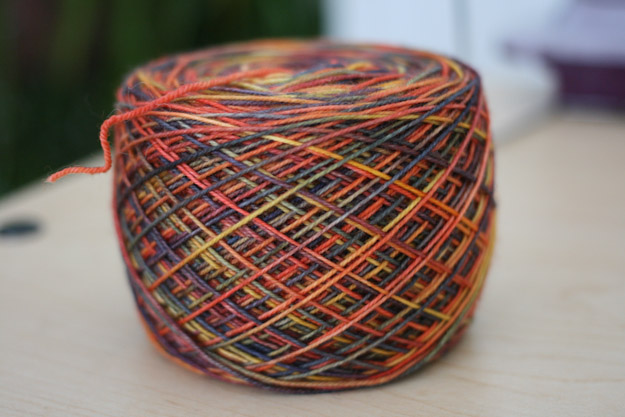
Here is my finished hank. This took me less than five minutes and Mr. MVP was shooting photographs.
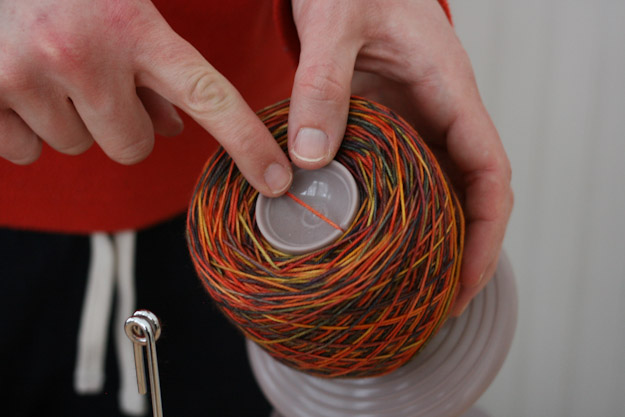
Before you take your hank off the ball winder stop and remember back to when you placed the end of your yarn in the slit on the top of the tube and then I suggested you take a moment and confirm that the tail of the yarn is wrapped underneath the yarn. For you non-knitters, what I’m pointing to is the end of a center pull hank of yarn. This end is very important, so before you pull your cake or hank of yarn off the ball winder hold on to that little piece of yarn.
I grab it between my thumb and pointer finger and then lift the hank of yarn off the winder with my other hand. The hank may stick a little depending on how much yarn you have.
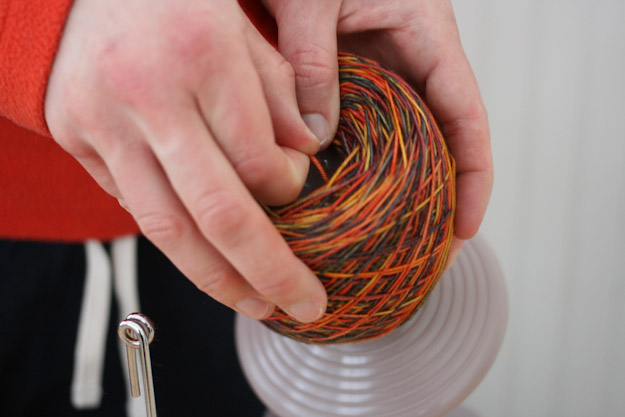
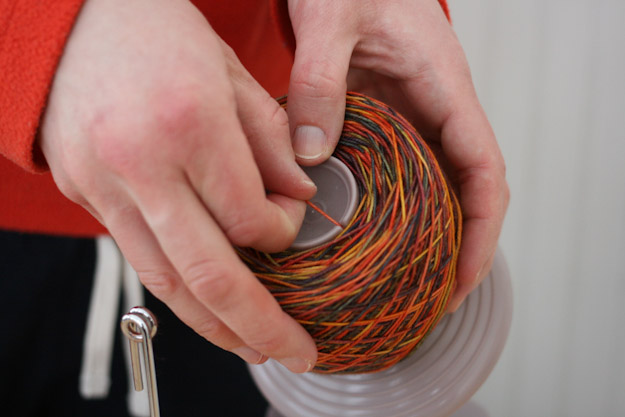
Push upwards and the inside of the hank will collapse inwards. Don’t worry, just don’t let go of that piece of yarn.
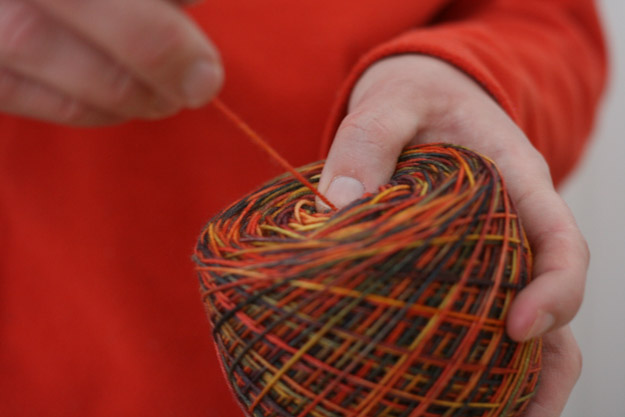
Now you can attach the tag to the piece of yarn sticking out of the center to let your favorite knitter know where to start, or if you are the knitter, you now have a center pull hank.
Now, take your newly formed hank, return the scissors to their rightful owner and smile sweetly to the women in line behind you. You are smarter than the yarn swift.
About The Author
Nicole
Member of Team VP, knitter and Mama to Blue and Franks. Life, is bloody good.