*I love free knitting patterns and I am going to keep writing and producing patterns of my own to give to all of you, so I really do not like finding my patterns for sale on Etsy. Please feel free to share my patterns with your knitting friends and of course make as many glorious knitted objects to give away as possible, but do not sell this pattern or the goods that result from it. If you have any questions, or see my pattern for sale, please contact me.
Yesterday a photography client of Kazoo Knits contacted me and asked if I could knit a bright orange deer hat for a newborn baby. I was happy to help, so I started to look for photographs on Ravelry so I could recreate the deer hat. I found one adult hat on Ravelry and because the photographer said she spotted the hat on Etsy, I wandered over there and found a couple more options.
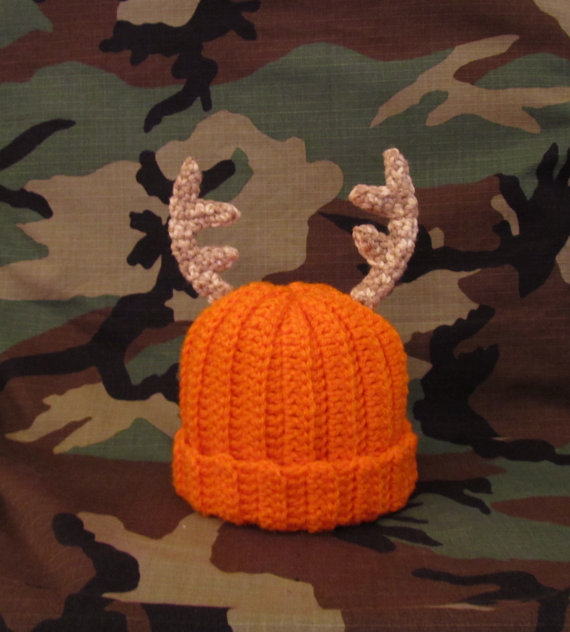
$25 For This. Oh My God.
I’m not big on paying for patterns so after quite a bit of time inspecting the photos on Ravelry and a couple emails to the photographer, I had a plan and a pattern. This pattern is mine, but it’s now yours to use as you see fit – free of charge because that is how I like my patterns. Happy knitting!
This pattern is for a newborn hat, but you can easily adjust it for any size head by making the hat, ears and antlers larger. Here are the supplies:
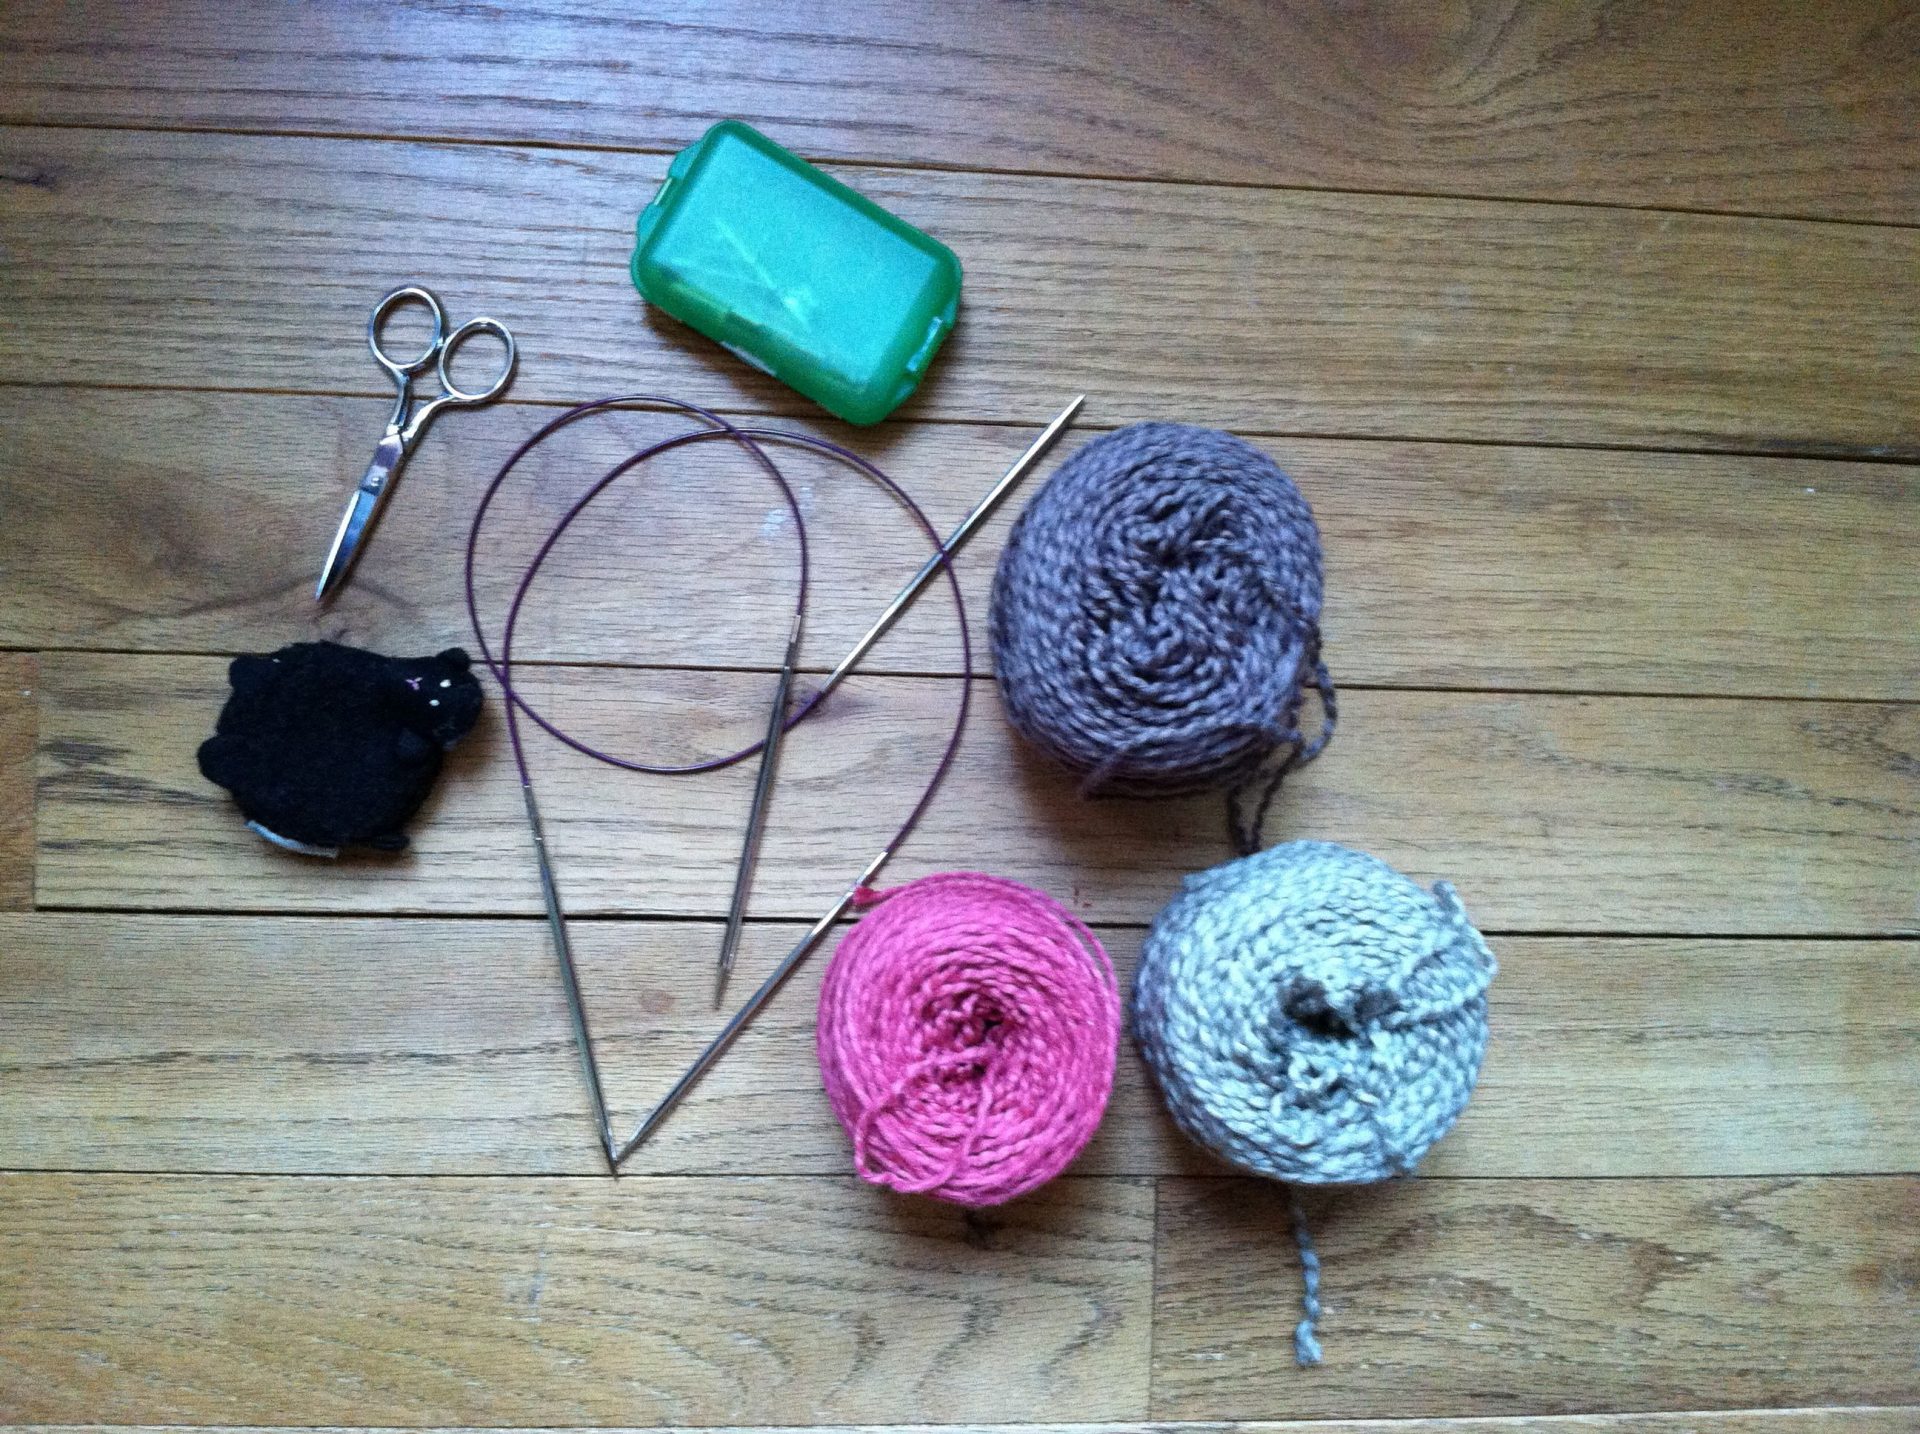
This Is What You Will Need.
- Worsted weight yarn of your choice. I used Lion Brand Nature’s Choice Organic Cotton in brown, pink and khaki.
- Size 7 needles.
- Size 5 needles.
- Sewing needle.
- Scissors.
- Tape measure.
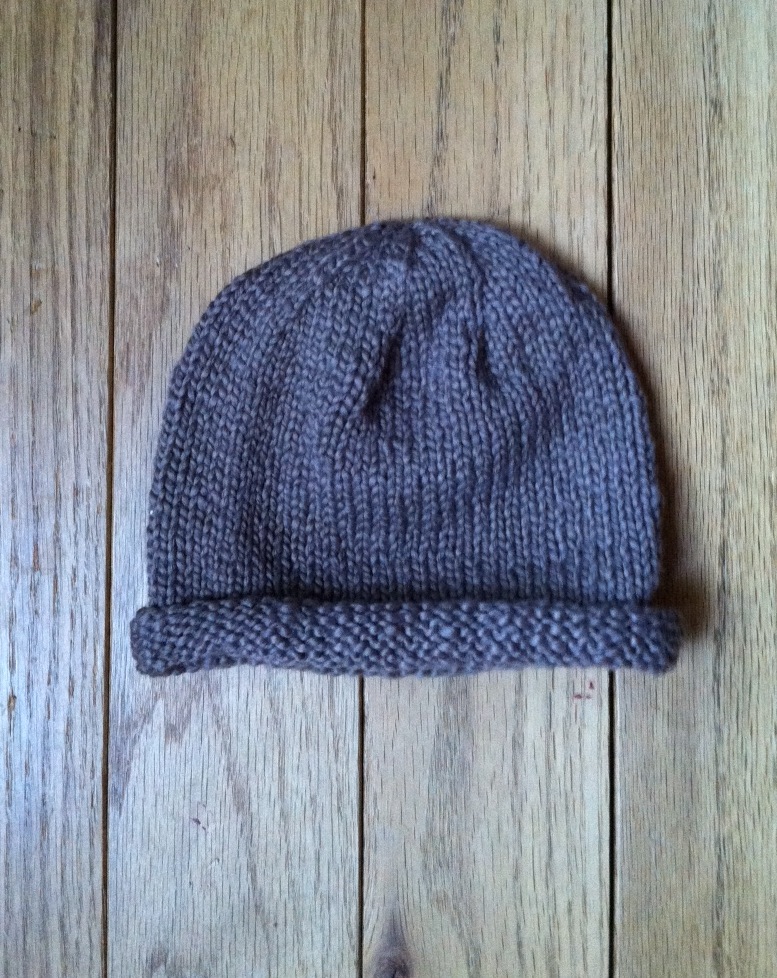
For the hat, with size 7 needle, cast on 64 stitches and join in the round. Knit in the round for approximately six inches and then begin to decrease:
- Knit 6 stitches, knit 2 stitches together. Repeat to the end of the round
- Knit one round
- Knit 5 stitches, knit 2 stitches together. Repeat to the end of the round
- Knit one round
- Knit 4 stitches, knit 2 stitches together. Repeat to the end of the round
- Knit one round
- Knit 3 stitches, knit 2 stitches together. Repeat to the end of the round
- Knit one round
- Knit 2 stitches, knit 2 stitches together. Repeat to the end of the round
- Knit 1 stitch, knit 2 stitches together. Repeat to the end of the round
- Knit all stitches
- Knit 2 stitches together
- Cut the yarn making sure to leave a 5 inch tail and thread it on your sewing needle. Pull the yarn through the remaining stitches and weave in the end on the inside of your hat.
Wait There’s More.
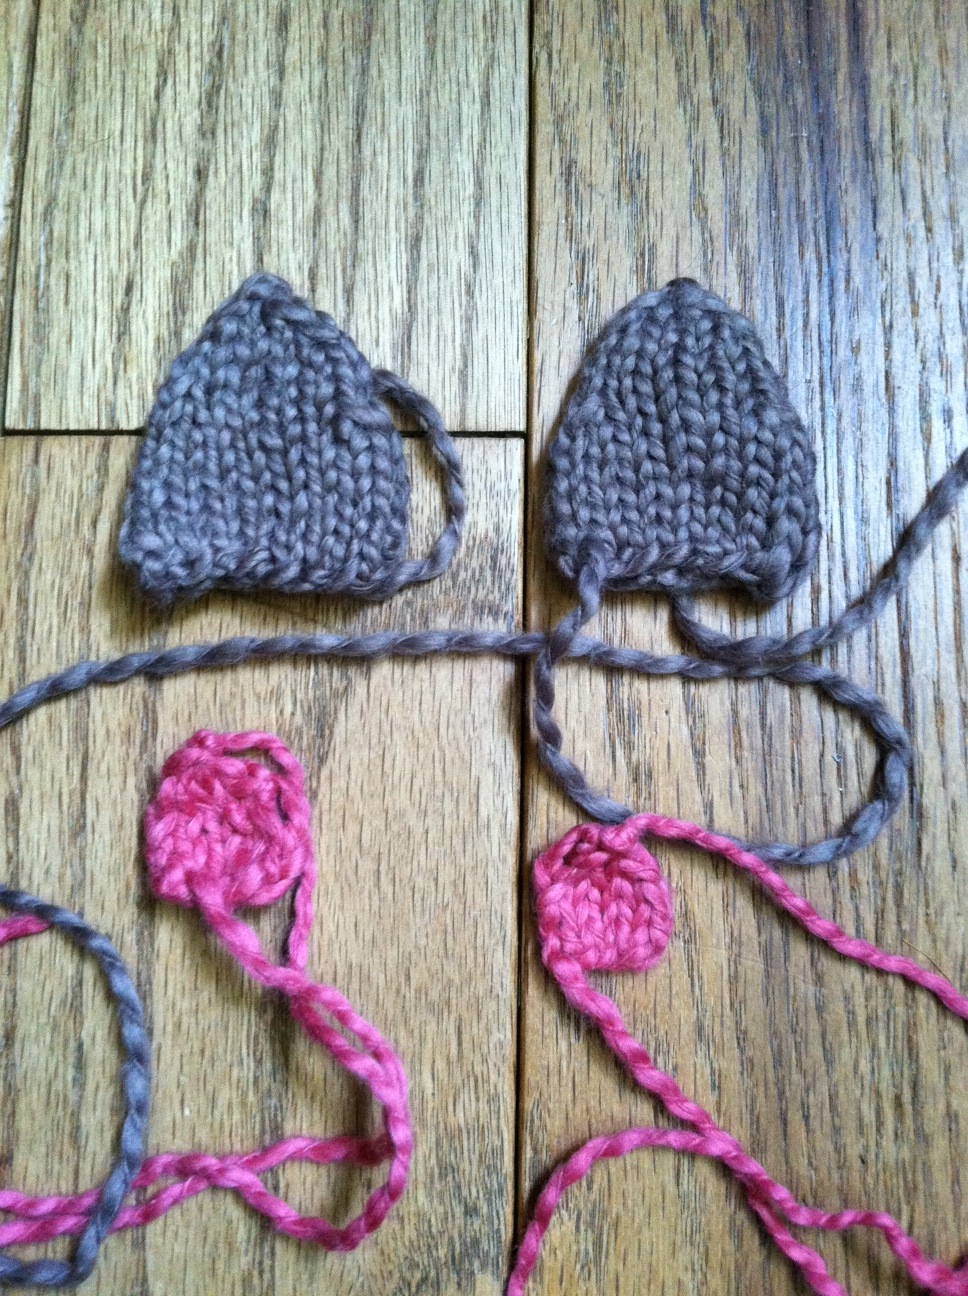
The ears are knit in the same brown as the hat body and are also knit in the round. You will obviously need to knit two ears. Here is what you do for the outer ear:
- Cast on 16 stitches and divide stitches evenly between two needles to join in the round
- Knit 6 rows
- Begin the decrease rows as follows:
- SSK, knit to last two stitches on the first needle, K2tog
- SSK, knit to last two stitches, K2tog (12 stitches total)
- Knit 3 rows
- SSK, knit to last two stitches on the first needle, K2tog
- SSK, knit to last two stitches, K2tog (8 stitches total)
- SSK, knit to last two stitches on the first needle, K2tog
- SSK, knit to last two stitches, K2tog (4 stitches total)
- K2tog twice (2 stitches total)
- Cut the yarn making sure to leave a 4 inch tail and thread it on your sewing needle. Pull the yarn through the remaining stitches and pull it through the inside of your ear.
Next you will want to knit two small pink inserts for the inside of the ears. I knit these with pink yarn.
- Cast on 5 stitches leaving a 7 inch tail
- Starting with a purl row knit 3 rows back and forth in stockinette stitch
- SSK, knit 1, K2tog (3 stitches)
- Purl 3 stitches together
- Cut the yarn making sure to leave a 7 inch tail and thread it on your sewing needle. Pull the yarn through the remaining stitch. Leave the tail attached so you can use it to attach the pink inner ear to the brown outer ear.
Almost Done.
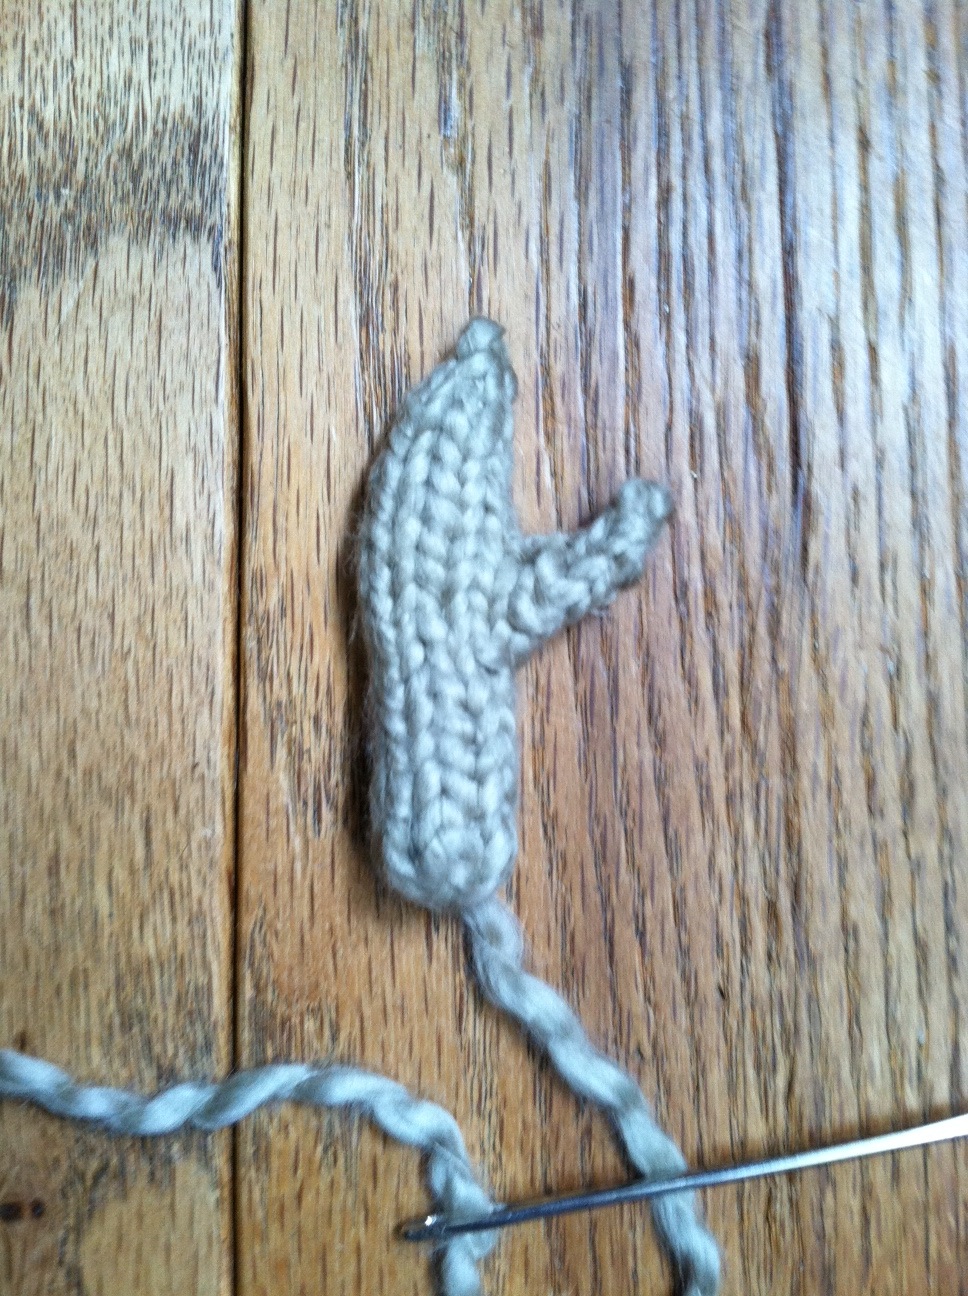
For the antlers switch to your size 5 needles.
- Cast on 6 stitches
- Knit 6 rows
- KFB, knit to the last stitch, KFB (8 stitches)
- Knit 1 row
- KFB, knit to last stitch, KFB (10 stitches)
- Knit 1 row
- Slip the 4 newly created stitches on a stitch holder or safety pin and then continue knitting main 6 stitches
- Knit 5 rows
- K2tog, knit to last two stitches, K2tog
- K2tog twice
- Cut yarn leaving a 4 inch tail and thread it on your sewing needle. Pull the yarn through the remaining stitches. Pull the tail through the antler to give it a little sturdiness.

This Will Turn Into An Antler, I Promise.
Pick up the four stitches from the safety pin and join in the round.
- Knit 2 rows
- K2tog twice
- Cut the yarn leaving a short tail and thread it on your sewing needle. Pull the yarn through the remaining stitches and bury the tail.
To finish the hat you will need to sew the pink inner ears to the brown outer ears.

Then take each ear and pinch it in the back and place a few stitches to hold the crease. I found that having the ears folded a bit makes them a little more deer like and a little less cat like.

Now you are almost finished. Simply take each ear and antler and sew them to the top of the hat. I placed my ears on the outer sides of the hat and the antlers on the top facing each other. I learned a while ago that placement with extras like this is really not as big of a deal as we all think it is. As long as everything is placed evenly, the kid who is wearing the hat really doesn’t care where the ears are and placing things off center adds to the charm of a hand knit hat. Weave in your ends and enjoy.
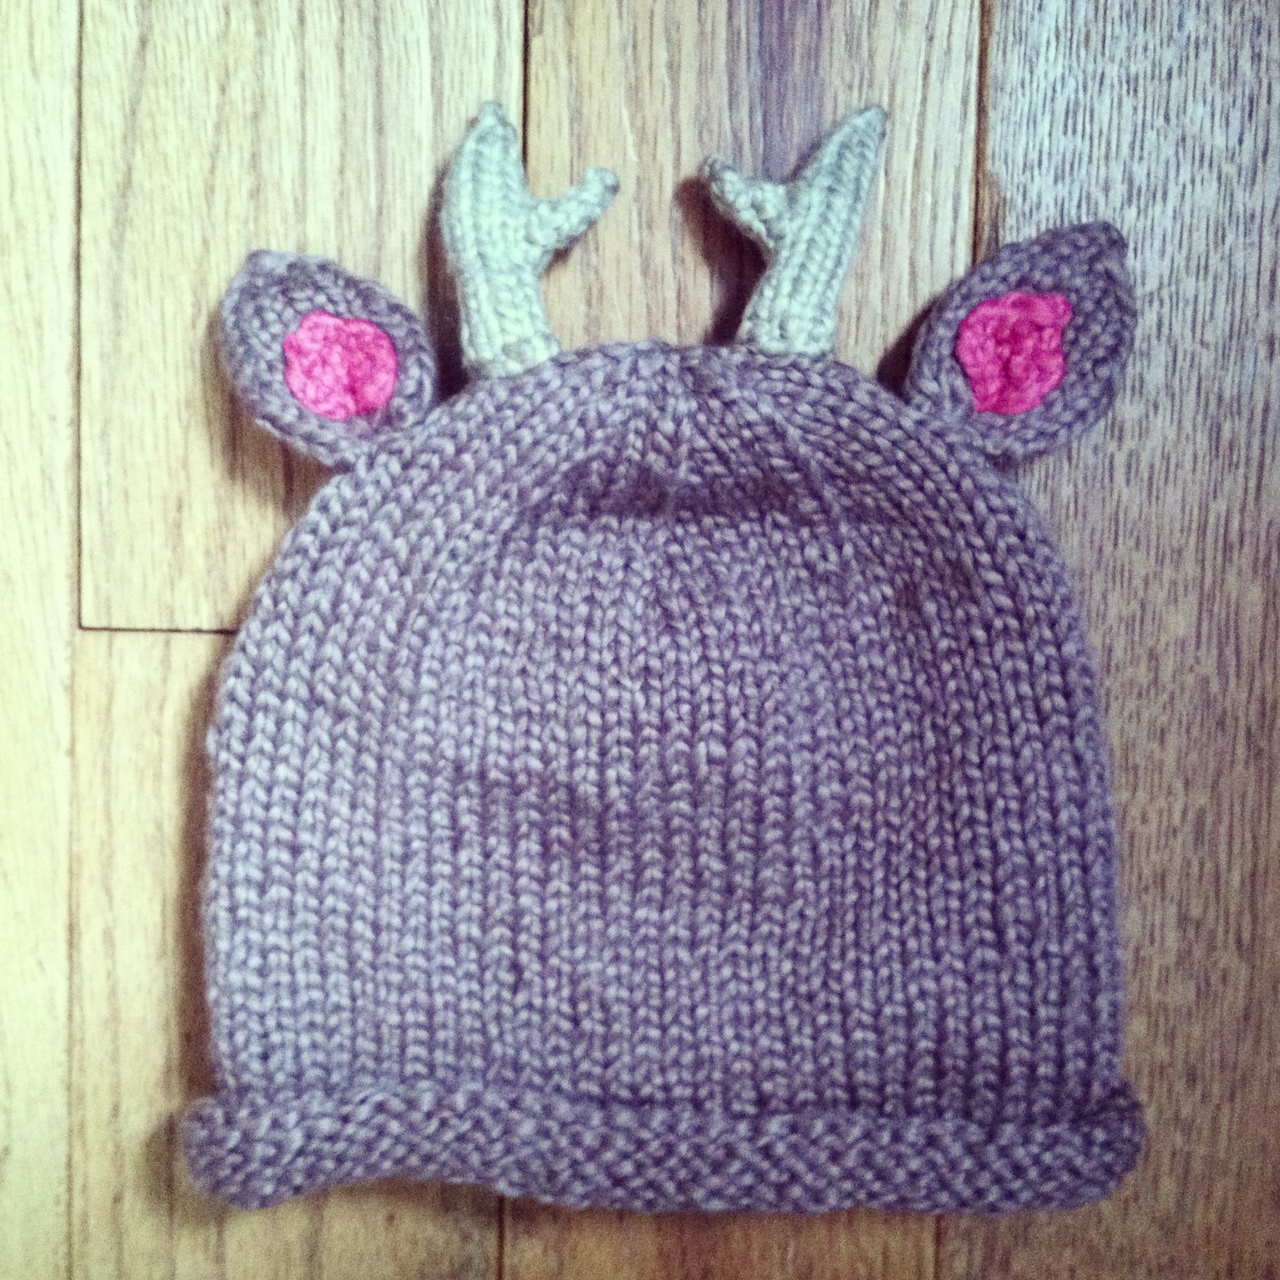
It All Comes Together.
About The Author
Nicole
Member of Team VP, knitter and Mama to Blue and Franks. Life, is bloody good.

Love the reindeer pattern
Thanks Kathi! Happy knitting 🙂
Hi. I am a little confused on the antler part. I understand how to do the antler up until I get to the part that says to put the 4 stitches back onto a needle and join in the round. How would I do that if all I have are stitches and no yarn go knit with? Thank you.
Hi,
I have been working on the antlers and I am confused. I understand the part that says leave for stitches but I don’t understand how o go back and knit them. I have them on a needle but all I have are stitches. There isn’t any yarn to knit with. Where did I go wrong?
Thank you
Do you happen to have a pattern for the dog reindeer hat? I would love to make one for my daughter’s dog for Christmas. Thanks!
Peg, I know there is a pattern on Ravelry for this hat. The writer of the pattern calls it a snood. Happy knitting!
Hi, I am having trouble knitting the antlers. My stitches don’t look like ribbing. What am I doing wrong.
Rebecca, the stitches should look like normal knit stitches, there is no ribbing involved. All of the stitches are plain knit, nothing fancy.